Recently, I have started to learn about Unreal Engine 4 and C++ programming to up my skills. With these mini tutorials, I’ll be explaining small implementations of features that are helping me learn the engine. The reason for creating these blog posts is to release more knowledge about using C++ in UE4, as there’s tons for blueprints, but not so much for C++.
The whole Unreal Engine 4 project being used is available on my Gitlab profile or following through the link here: https://gitlab.com/Robinaite/learningunrealengineproject
All the code written by myself is licensed under the MIT License, the unreal engine and the base template are copyrighted by Epic Games.
Unreal Engine version used is 4.32
Well, let’s get onto the interesting now!
So, how do I change material colour or other properties at runtime?
First of all we need to understand, that you cannot edit the material attached to an mesh directly at Runtime. A typical material cannot be edited or changed without recompiling. Thus, we make use of something called a Material Instance. An instanced material allows us to change the material without needing to do expensive recompilations.
There are two types of Instanced Materials:
- Constant Material Instance
- Dynamic Material Instance
For our case we will be using dynamic material instance, as this type will allow us to edit properties at runtime.
FYI: Not all material parameters can be changed at runtime. By default, some basic properties are available, such as changing the colour, but you’ll need to expose the parameters in case you need more complex ones.
Now that that is out of the way let’s look at how to change the properties of a material from an object at runtime.
1. Creating the Dynamic Material
First, we need to create a dynamic material instance of the material attached to the object.
With this line you can create a dynamic material instance
which we can change the properties from. The constructor requires two values:
- *ObjectMaterial – The material used as a base to create a dynamic instance.
- *InOuter – An outer object to start searching, this should be the same object the material is on as to minimize performance impact.
2. Set the dynamic material instance on the mesh
After creating the dynamic material instance you need to set the material on the object, by doing:
Here, the first parameter passed through is the element index, in case the mesh has multiple elements (think of sub-meshes).
3. Edit the properties
Afterwards, having the dynamic material instance set we can start editing it’s properties.
There are various kind of material properties, all material
properties will be of one of the following types:
All these types come in two ways to be set, either through the parameter index, or through its value. Below you can find some examples. To know what each parameter needs check the UE4 Documentation.
There we go, now you can edit any material property at runtime!
Here’s a gif of what you can do:
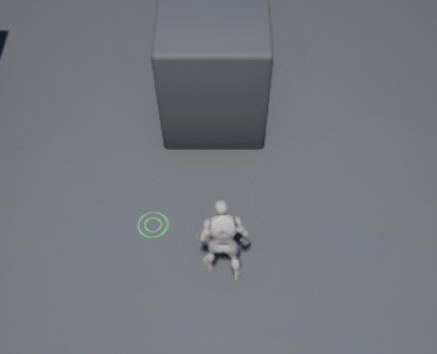
I’m changing the decal material colour depending on a tag on
an object. This can be used for mouse over enemies, or anything else!
I hope you’ve learned something in this mini tutorial! If you want to give feedback, be sure to contact me on twitter: @Robinaite
You can find more information about the following topics here:
https://docs.unrealengine.com/en-US/Engine/Rendering/Materials/MaterialInstances/index.html and https://docs.unrealengine.com/en-US/API/Runtime/Engine/Materials/UMaterialInstanceDynamic/index.html